My short attention span has got me doing a little bit of this quilt and then moving on to another. Lately, I have just wanted to bop around from one
project to another. Today, for example, I worked on the Denise quilt--I finished all of her squares. I worked on designing an animal print bed covering quilt for my
Steph. I completed three rows on the
Zig Zag and then started playing with a pretty
selvage edge spider web quilt. I should probably be medicated for some form of attention
deficit disorder. Lucky for me, there are few drawbacks to thriving on variety. And in this case plenty of rewards.
The
selvage edge spider web quilt is just one of those little rewards. While surfing my blog favorites, I got the idea from the this blog. It is so pretty and the quilting is inspiring. Check it out:
http://selvageblog.blogspot.com/2010/03/spider-web-quilt-is-quilted-wow.htmlI can't remember exactly where I found the tutorial , but I will look and try to add it in for reference. ( Here is the link:
http://tallgrassprairiestudio.blogspot.com/2010/04/spiderweb-tutorial-for-selvages.html) When I looked at the directions I began to doubt I would still want to do it, but once I got going, it was not difficult. Plus, look I got to use a
smidge of my mermaid fabric. The tutorial suggested cutting the
selvage edge with
varying thicknesses of fabric showing. You can see that some of mine are real thick and others are a narrow band. But you will notice each of them has at least a little peek-a-boo of the fabric which the
selvage edge is
attached. The thing that makes this quilt so cute is the combination of all of the color info and logo on the
selvage edge. ...And to think, I used to just throw that part away. A
finished square looks like this:

Each diagonal half of the square is assembled on a piece paper. The first thing is to follow the tutorial directions to cut the tan piece. Then lightly glue the it on diagonal half of an 8.5" square piece of paper. The first layer is closest to the tan, place a section of
selvage edge right sides together with the outside long side of the tan and sew along the long side of the tan. Sew through the fabric and the paper. Then flip that first section of
selvage right side up and get another
selvage edge ready to tuck 1/4 inch under the bottom edge of the previous section. Sew the first edge down right at the edge of the
selvage edge with the new piece tucked 1/4 inch under. Keep adding
selvage edges until you reach the point (try not to make it bulky here). I realize that these written directions may be difficult to follow, so I suggest
checking out the very clearly illustrated tutorial.

So this is what the piece top looks like after all the sections are sewn on and only one side has been trimmed. If you flip the triangle over, it looks like this:

When you have 2 of these triangles finished, then sew them together, right sides together along the long edge of the triangle. When you get a few of them done, you can lay them out and take a peek:

Do you see my little Heather Ross mermaids?

I have raided all of my fabric stash for
selvage, the more color test dots the better.
It is a good puzzle like activity of trying to best utilize the pretty stuff on the edges. Seriously, I spent way too much time playing with it. How many hours of sleep at night are REALLY necessary anyway?!?


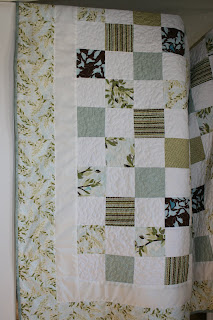
 The "Feathered Friends - Love Birds" is my 30th anniversary quilt. (Thirtieth quilt, not thirtieth year.) I fell pretty hard for the fabric and so the quilt cam together quickly. That is something I am discovering in my quilting: If I really like the fabric, I tend to work more on a quilt (mostly). Of course, as soon as I type that I can think of several exceptions to this "rule", but mostly I would say it is true.


 Yours Truly, The Gadabout:


.JPG)
.JPG)
.JPG)


 Heather